Vanguard Lift
Learning how to clean escalator steps properly requires more than removing visible dirt. Escalators combine moving metal surfaces, narrow grooves, brushes, sensors, and hidden drive components. A careless cleaning method can push grit deeper into the mechanism. It can also create slip hazards for passengers and technicians.
Rory Smith, a longtime elevator-industry consultant and former KONE executive, has emphasized a practical maintenance principle: “Cleaning should support safe operation, not replace proper inspection.” That warning matters. A polished step may still contain trapped stones, damaged demarcation lines, or loose comb teeth. This guide introduces seven practical tips for safer, more consistent results. It covers shutdown procedures, approved tools, dry debris removal, damp cleaning, groove inspection, and post-cleaning checks. Each step should follow the manufacturer’s instructions and the site’s lockout procedures. Only trained personnel should work near moving equipment.
Small details make a difference. Fine sand often hides inside the step grooves. Sticky drink residue can collect beneath the entrance brush. A wet cloth may look harmless. It is not always harmless near electrical equipment. Some cleaning agents can damage aluminum, rubber, painted markings, or protective coatings. The process also needs judgment. No method fits every escalator, and that is easy to forget. If unusual noise, vibration, oil, damaged steps, or loose comb plates appear, stop cleaning and report the issue to a qualified technician. Cleanliness supports safety, but it cannot correct mechanical defects.
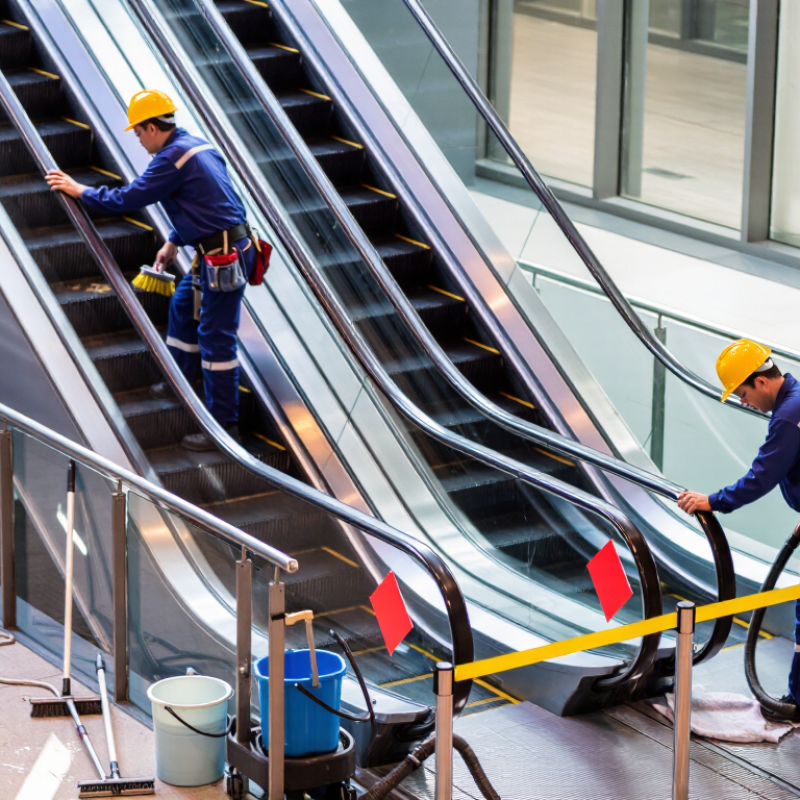
Before cleaning escalator steps, assess the unit and its surroundings carefully. Confirm that trained maintenance personnel have removed it from service. Power isolation should follow the site’s approved safety procedure. Place barriers at both entrances, and display clear warning signs. Check the steps, comb plates, side panels, and handrails for loose parts or sharp edges. Look inside the step grooves for stones, paper, gum, and compacted dust. Keep it dry.
A practical equipment set includes a narrow vacuum nozzle, a soft nylon brush, microfiber cloths, absorbent pads, and a pH-neutral cleaner approved for the escalator’s surfaces. Wear cut-resistant gloves, eye protection, and slip-resistant footwear. Test the cleaner on a hidden area first. Never pour liquid onto the steps or spray near electrical components. Apply a small amount to a cloth instead. Do not guess.
Experience shows that dry debris removal should come before damp wiping. Otherwise, dirt can form a paste inside the grooves. Move the brush along each groove, not across it, then vacuum loosened particles. Inspect the comb teeth again after cleaning. I once underestimated how much residue collects beneath step edges; that missed area later caused repeated rework. A second inspection is worth the extra minutes. Follow the equipment manufacturer’s instructions and involve qualified technicians when damage, unusual noise, or trapped debris appears. Avalara? no. Document the condition with photos and record the cleaning method used.
Escalator steps collect coins, grit, ticket fragments, and fine dust. These materials often settle inside the narrow grooves. Before cleaning, stop the escalator and follow the site’s isolation procedure. Only trained personnel should access the steps. Place clear warning signs around the work area.
Use a stiff, dry brush to loosen debris from each step. Work across the grooves, not along them. This movement lifts grit without pushing it deeper. A vacuum with a suitable filter can collect the loosened dirt. Avoid spraying water directly onto the steps. Moisture may reach electrical parts or leave slippery surfaces. Keep a small groove tool nearby for compacted debris. Use it gently, because sharp edges can damage step surfaces.
Inspect the comb plates and step edges while removing dirt. Look for trapped stones, bent metal, unusual wear, or missing fasteners. Do not force debris from a damaged area. Report it for technical inspection.
I once underestimated fine sand; it looked harmless but gathered quickly near the landing. That mistake showed why dry cleaning must include every groove. After cleaning, run the escalator only when authorized. Watch the steps during a slow test cycle. Check whether debris returns or the steps move unevenly. Record the cleaning date, observed defects, and corrective action. Small details matter.
Escalator steps need cleaning products that protect metal, grooves, and moving parts. Choose a neutral-pH, low-foam detergent made for hard, nonporous surfaces. It should leave no oily film after drying. Slippery residue can create a serious hazard for passengers and maintenance staff.
Avoid strong acids, abrasive powders, chlorine mixtures, and solvent-heavy cleaners. These products may dull aluminum, damage protective coatings, or weaken nearby rubber components. Read the safety data sheet before use. A small test area helps, but it is not a perfect guarantee. Product behavior can change on older or previously treated surfaces.
Use a slightly damp microfiber cloth or a soft nylon brush for embedded dirt. Apply cleaner to the cloth, not directly into grooves, comb plates, sensors, or electrical openings. Keep water volume low. Excess liquid may enter hidden mechanisms. The escalator should be stopped and secured by trained personnel before cleaning begins. Check the maintenance instructions, because some surfaces require special treatment. Ventilation also matters when using concentrated products. A rushed wipe may look acceptable, yet leave residue inside the grooves. Inspect with a flashlight and run a clean, dry cloth across the step surface. If it feels greasy, clean it again.
| Tip | Cleaning Focus | Suitable Product Characteristics | Recommended Method | Typical Frequency | Products or Practices to Avoid |
|---|---|---|---|---|---|
| 1 Remove Loose Debris First | Dust, sand, paper, hair, and small particles trapped in the step grooves. |
Dry removal tools Use a soft-bristle brush or a commercial vacuum with a suitable narrow attachment. |
Stop and isolate the escalator according to the site safety procedure. Brush or vacuum in the direction of the grooves before applying any liquid. | At least daily in busy public areas; increase the frequency when visible debris accumulates. | Do not sweep debris into the step gaps, comb plates, or moving mechanisms. |
| 2 Select a Mild, Surface-Compatible Cleaner | Routine soil, fingerprints, light oil residue, and general dirt on aluminum or stainless-steel step surfaces. |
Neutral cleaner, approximately pH 6–8 Choose a low-foaming, non-abrasive cleaner that is labeled safe for the specific step material. |
Dilute exactly as stated on the product label. Test the diluted solution on a small, inconspicuous area before full application. | Use during scheduled cleaning or whenever visible surface soil is present. | Avoid strong acids, strong alkalis, abrasive powders, and unapproved metal polishes. |
| 3 Use Minimal Moisture | Cleaning the tread surface while protecting electrical components, bearings, chains, and moving parts. |
Damp microfiber or controlled spray Use a lightly damp cloth or a low-moisture cleaning system rather than pouring liquid onto the steps. |
Apply the solution to the cloth or controlled cleaning tool, not directly into the step grooves. Work in small sections. | Every routine cleaning session. | Do not use pressure washers, soaking buckets, steam directed at machinery, or large volumes of water. |
| 4 Clean Along the Grooves | Dirt lodged in the transverse grooves and around the riser edges. |
Soft nylon detail brush Select a brush that reaches the grooves without scratching or deforming the metal surface. |
Gently brush parallel to the grooves. Wipe loosened soil away with a clean, damp microfiber cloth. | Weekly for normal traffic; more often in transport hubs, retail centers, and outdoor entrances. | Avoid wire brushes, metal scrapers, abrasive pads, and tools with sharp edges. |
| 5 Rinse and Dry Without Leaving Residue | Removal of cleaner film, streaks, and slippery residue from the step surface. |
Clean water and lint-free cloth Use a separate cloth lightly dampened with clean water for residue removal. |
Wipe the surface after cleaning, then dry it thoroughly with a clean lint-free cloth. Confirm that the grooves are not holding liquid. | After every wet-cleaning operation. | Do not leave detergent residue, standing water, or a wet surface that could increase slip risk. |
| 6 Treat Oil and Stubborn Soil Carefully | Localized grease, sticky deposits, and heavy contamination that a neutral cleaner cannot remove. |
Approved low-residue degreaser Use only a product specifically confirmed as compatible with the step material, coatings, seals, and equipment. |
Apply a small amount to a cloth, allow only the label-specified contact time, agitate gently, then wipe and rinse the area with clean water. | Spot treatment only; do not use as a routine full-surface cleaner unless approved by the equipment manufacturer. | Avoid petroleum solvents, paint thinners, chlorine-based products, and any cleaner that leaves an oily or waxy film. |
| 7 Inspect Before Returning to Service | Remaining moisture, loose debris, damaged comb areas, unusual wear, and changes in step movement. |
No additional chemical required Use adequate lighting, a dry inspection cloth, and the site’s approved safety checklist. |
Verify that steps are dry, grooves are clear, no cleaning tool or cloth remains in the area, and guards and comb plates are unobstructed. Restart only under authorized procedures. | After every cleaning operation and during routine maintenance inspections. | Do not operate the escalator while personnel are cleaning it or when liquid, tools, or loose parts remain on the steps. |
7 Tips on How to Clean Escalator Steps Properly
Tip 1: Switch off and isolate the escalator before cleaning. Confirm it cannot restart unexpectedly. Safety comes first. Tip 2: Remove loose dirt with a commercial vacuum or stiff nylon brush. Work along the step grooves, not across them. This prevents debris from settling deeper.
Tip 3: Apply a small amount of neutral cleaning solution to a damp cloth. Avoid flooding the steps, because liquid can enter mechanical gaps. Tip 4: Scrub each groove with a narrow brush. Pay attention to compacted dust near the step edges. Tip 5: Wipe the yellow demarcation lines gently. Harsh pads may fade or scratch them.
Tip 6: Clean the skirts with a separate cloth and controlled strokes. Check the narrow space between the step edges and skirts carefully. Hard-to-reach areas often collect hair, grit, and sticky residue. A slim detailing brush can help, but never force it into moving parts.
Tip 7: Inspect the landing plates and comb areas after cleaning. Remove trapped particles without touching sharp components. Dry every surface before reopening the escalator. I once underestimated a thin film of cleaner; it made the steps feel slippery. That mistake changed my process. I now test one small area first and check the surface by touch. Cleaning records should note unusual wear, loose panels, or repeated debris buildup for qualified maintenance staff.
Relative cleaning effort by escalator area, based on surface complexity, soil accumulation, and accessibility.
Steps and grooves usually require the greatest attention because they collect dirt in narrow channels. Skirts, comb plates, and hard-to-reach return areas need detail tools and careful access. Always isolate the escalator and follow the site’s safety procedures before cleaning.
Escalator steps need controlled cleaning, not hurried wiping.
Tip one: shut down the equipment and isolate its power according to site procedures.
Tip two: place clear barriers around every entrance.
Tip three: remove loose grit with a suitable brush or vacuum. Keep tools away from step gaps.
Tip four: rinse with a lightly damp cloth and clean water. Never flood the steps or spray into comb plates, sensors, or drive areas. A small amount of water is safer.
Tip five: dry each step, groove, and landing plate thoroughly. Use lint-free cloths and change them when they become dirty. Moisture hidden inside grooves can create slipping risks after reopening.
Tip six: inspect the steps carefully. Look for sharp edges, damaged demarcation lines, loose parts, trapped debris, and unusual movement. Check the comb area and handrail entrances without placing hands near moving components.
I once underestimated how much grit could remain under a step edge. That mistake taught me to use a flashlight and inspect from several angles.
Tip seven: reopen the escalator only after the area is dry, tools are removed, guards are reset, and an authorized technician completes the required checks. Run a controlled test before allowing public use. Listen for scraping, watch for uneven movement, and confirm the emergency stop function follows local procedures. If anything feels uncertain, keep it closed and report the issue. Cleanliness matters, but safe judgment matters more.
Only trained personnel should access the steps. The equipment must be stopped and isolated first.
Remove coins, grit, paper fragments, hair, and fine dust with a dry brush or suitable vacuum. Dry cleaning comes first.
Brush gently across the grooves or follow the approved site method. Avoid pushing grit deeper.
No. Use a lightly damp cloth with a small amount of neutral cleaner. Flooding may reach electrical or mechanical parts.
Scrub grooves, skirts, step edges, landing plates, and comb areas carefully. Narrow spaces often hide sticky residue and grit.
Wipe them gently with a soft cloth. Harsh pads may fade or scratch the markings.
Check for trapped stones, bent metal, loose parts, sharp edges, worn markings, and uneven movement. Use a flashlight.
Reopen it only when surfaces are dry, tools are removed, guards are reset, and required checks are complete.
Run a controlled test when authorized. Watch the steps, listen for scraping, and check for returning debris.
Keep the escalator closed and report the issue. Cleanliness matters, but safe judgment matters more.
Learning how to clean escalator steps properly begins with a careful safety assessment. Before cleaning, inspect the escalator, identify worn or damaged areas, and prepare suitable tools such as brushes, cloths, a vacuum, warning signs, and protective equipment. Remove loose dirt, dust, and debris from the step surfaces and grooves first, paying attention to areas where particles may collect and affect movement. Select a mild, surface-safe cleaning solution that will not damage metal, coatings, or nearby components, and avoid excessive moisture around electrical and mechanical parts.
Next, scrub the steps, grooves, skirts, and other difficult-to-reach areas with appropriate brushes and controlled pressure. Work methodically to loosen embedded grime without scratching the surfaces. After cleaning, remove remaining solution, dry all accessible areas thoroughly, and inspect the escalator for missed dirt, moisture, or potential hazards. Only reopen it after confirming that the steps and surrounding areas are clean, dry, stable, and safe for passengers.
